
Tips for Capturing Stunning Photos of Backyard Birds with DSLRs

By Robert Hale · Senior Editor
Published January 1, 2026 · Last reviewed May 12, 2026
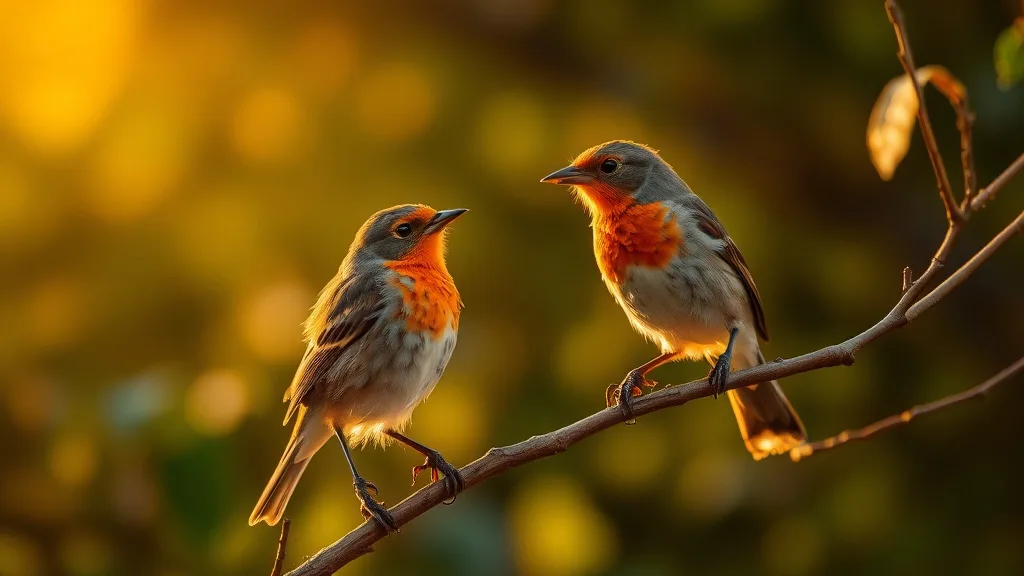
Tips for Capturing Stunning Photos of Backyard Birds with DSLRs
You’ve got a DSLR in hand, a backyard full of visiting birds, and an eagerness to capture their vibrant colors and natural behaviors—but somehow your photos end up blurry, distant, or lacking the crispness you hoped for. This is a common challenge for backyard bird photographers who want to move beyond casual snapshots to truly stunning images. The good news is you don’t need the fanciest gear or a professional studio setup; with understanding and thoughtful technique, you can take your bird photography to the next level using your DSLR.
This guide will walk you through practical tips and considerations designed to help you capture sharp, well-exposed, and engaging photos of birds right in your backyard.
See also: How to Photograph Birds in Flight in Your Backyard Successfully
Understanding Your DSLR for Bird Photography
Before diving into techniques, it’s important to know how your DSLR’s settings and capabilities impact bird images:
- Optics Quality: The lens you use often matters more than the camera body. Telephoto zooms (e.g., 300mm or longer) let you fill the frame with your subject without disturbance.
- Shutter Speed: Birds move quickly. A fast shutter (1/1000s or faster) helps freeze motion.
- Aperture: Wide apertures (small f-numbers) blur the background, making your subject pop, but also reduce depth of field. Balancing aperture for sharp focus on the bird is key.
- ISO Performance: Low-light shots require higher ISO, but too high will introduce noise. Understanding your camera’s ISO limits preserves image quality.
- Autofocus System: Use continuous autofocus with tracking to keep moving birds sharp.
- Weather Resistance: Backyard conditions vary—rain, wind, dust. Weather-sealed cameras and lenses reduce the risk of damage.
Step-by-Step: Capturing Stunning Backyard Bird Photos
1. Choose the Right Lens and Setup
Why it matters: Good optics allow you to shoot from a distance without disturbing birds, and to capture fine detail.
- Use a telephoto lens between 300mm to 600mm if available.
- A tripod or monopod stabilizes your camera to avoid camera shake.
- If handheld, practice bracing yourself or use image stabilization.
2. Learn the Best Camera Settings for Birds
- Shutter Speed: Aim for 1/1000 second or faster, especially if birds are flying.
- Aperture: Start around f/5.6 to f/8 to get an optimal balance of detail and background blur.
- ISO: Set to Auto ISO with a maximum limit to avoid noisy images (for example, ISO 1600 on older cameras, higher on newer models).
- Focus Mode: Use Continuous Servo AF (Canon AI Servo / Nikon AF-C) plus focus tracking.
- Drive Mode: Use burst/continuous shooting to increase your chance of nailing a sharp, well-timed shot.
3. Find the Best Time and Light for Shooting
- Early morning and late afternoon provide soft, warm light and active birds.
- Avoid harsh midday sunlight which creates strong shadows and blown-out highlights.
- Shade and overcast days reduce contrast and can help evenly expose bird features.
4. Approach Birds Ethically
- Stay hidden or use natural cover to avoid startling birds.
- Avoid playback calls or lures that stress birds.
- Keep reasonable distances, using your zoom rather than physically approaching.
5. Compose Your Shots Thoughtfully
- Fill the frame but leave space for bird movement.
- Shoot from eye level or slightly below for a compelling perspective.
- Use backgrounds that contrast with the bird’s plumage without clutter.
- Include elements like branches or flowers for a natural look, but avoid distracting backgrounds.
6. Be Patient and Ready
- Birds move unpredictably. Spend time observing their habits and perches.
- Keep your camera ready; burst mode helps capture fleeting moments.
- Review images and adjust settings as lighting and bird behavior change.
Camera Settings and Use-Case Comparison
| Feature | Quick Flying Shots | Perching or Feeding Birds | Low Light / Dawn Shots | Action with Parent and Chick |
|---|---|---|---|---|
| Shutter Speed | 1/2000s or faster | 1/1000s | 1/500s (or slower if stable) | 1/1500s or faster |
| Aperture | f/5.6 - f/8 (focus sharpness) | f/8 - f/11 (depth to include bird parts) | Wide apertures (f/4–f/5.6) | f/5.6 - f/8 |
| ISO | Moderate-high (400–1600) | Low to moderate (200–800) | High (1600+) | Moderate (400–800) |
| Autofocus Mode | Continuous AF with tracking | Single or continuous AF | Continuous AF | Continuous AF with tracking |
| Burst Mode | Enabled | Optional | Useful if movement occurs | Enabled |
| Preferred Time of Day | Morning, late afternoon | Anytime | Dusk or dawn | Morning |
Common Pitfalls and How to Avoid Them
- Blurry Images from Slow Shutter: Always use a fast shutter speed to counter bird movement. When light is insufficient, increase ISO within your camera’s acceptable noise limits.
- Distracting Backgrounds: Pay attention to what’s behind your subject. A cluttered background distracts the eye and reduces impact.
- Disturbing Birds: Avoid sudden movements or calls that flush birds away. Patience and distance pay off.
- Overreliance on Auto Settings: While DSLRs’ auto modes are helpful, manual or semi-manual control (like shutter priority) yields better results by letting you control depth of field and freezing action.
- Ignoring Weather Conditions: Shooting in rain or wind without protection can harm gear and affect results.
Bringing It All Together: Patience, Practice, and Respect
Stunning backyard bird photos blend technical knowledge with a respectful approach toward wildlife. Take time to learn your camera, observe your subjects, and adapt based on conditions. Each bird encounter offers an opportunity to refine your skills and produce images that reveal the beauty and personality of the birds visiting your own backyard.
Frequently Asked Questions
Q: What is the best lens focal length for photographing backyard birds?
A: A telephoto lens between 300mm and 600mm is ideal. It allows you to keep a reasonable distance while filling the frame with detail.
Q: How can I avoid scaring birds away when photographing?
A: Stay at a distance, move slowly and quietly, use covers or blinds if possible, and avoid playback calls or flashing bright camera screens.
Q: Should I use autofocus or manual focus for bird photography?
A: For moving birds, autofocus with continuous tracking is recommended for sharp images. For perched or stationary birds, manual focus can give precise control, especially in low light or cluttered scenes.


