
How to Photograph Birds in Flight in Your Backyard Successfully

By Robert Hale · Senior Editor
Published January 1, 2026 · Last reviewed May 12, 2026
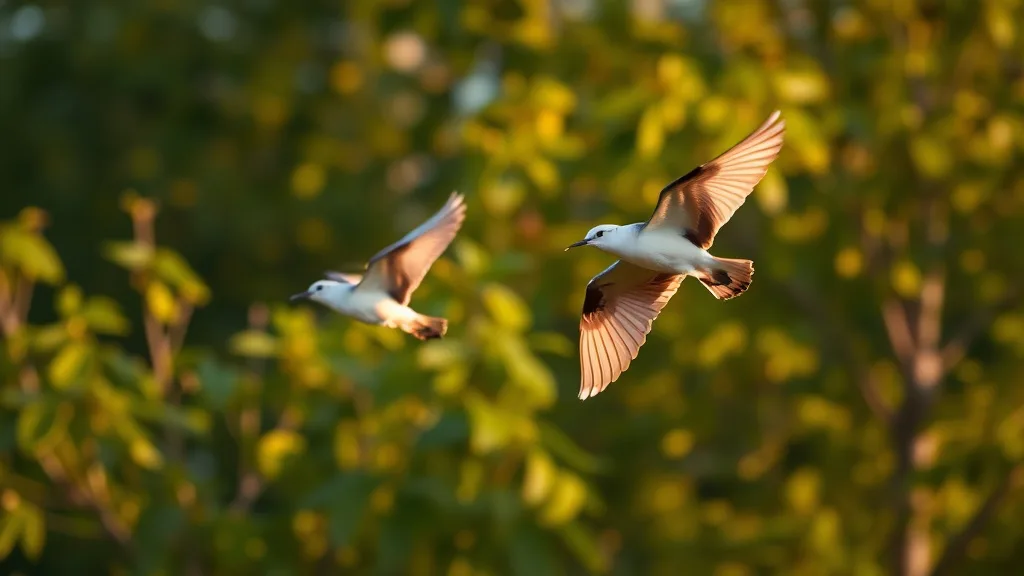
Photographing birds in flight in your backyard can be immensely rewarding but also frustrating if your images turn out blurry or poorly composed. The challenge lies in capturing fast, unpredictable subjects against varying light and backgrounds, all while respecting the birds’ natural behavior and minimizing disturbance. This guide will help you navigate optics choice, camera settings, shooting techniques, and ethical considerations to consistently get sharper, more striking bird-in-flight shots without stressing your feathered neighbors.
1. Optimize Your Optics for Flight Photography
Choose the Right Lens and Optics
To photograph birds in flight successfully, your optics must balance focal length, aperture, and autofocus performance. A telephoto lens with a focal length of 300mm or more lets you get close-up shots without intrusion. Aperture size is crucial: wider maximum apertures (f/4 or better) allow faster shutter speeds and better low-light performance. However, heavier lenses can be cumbersome and tiring to hold steady, so consider weight alongside optical quality.
Glassing Distance and Magnification
Birds in flight rarely approach very close — expect to shoot from a distance of at least 20-30 feet. Higher magnification lenses increase framing options but reduce field of view, making it easier to lose fast-moving birds. Some birders prefer zoom lenses (e.g., 100-400mm) for versatility, while others opt for prime lenses for sharper image quality.
Weather Resistance and Durability
Backyard bird photography often involves waiting outdoors in unpredictable weather. Weather-sealed lenses and camera bodies help protect your gear from moisture and dust, increasing reliability and lifespan.
See also: Best Practices for Photographing Nesting Birds Without Causing Stress
2. Camera Settings for Crisp, Well-Exposed Flight Shots
Use Fast Shutter Speeds
Birds in flight move fast—shutter speeds at or above 1/2000s are typically needed to freeze wing motion sharply. Slower shutter speeds risk motion blur, which sometimes creates artistic results but often disappoints.
Choose Continuous Autofocus Mode
To keep fast-moving birds in focus, set your camera to continuous autofocus (AF-C or AI Servo). Combine this with a flexible focusing area mode (like zone or tracking) rather than a single-point AF, so the camera can follow erratic flight paths more effectively.
Set Burst Mode for High Frames Per Second
Using the burst (continuous shooting) mode increases the chance of capturing a key moment, such as wing extension or a catch. Buffer size and card speed matter here; make sure your memory card supports rapid writing to avoid slowdowns.
Manage ISO Wisely
Higher ISO settings allow faster shutter speeds in low light but introduce noise. Find the balance based on your camera’s sensor performance and lighting conditions. Shooting at dawn or dusk may necessitate ISO 800 or higher.
3. Preparing Your Backyard for Success
Create Bird-Friendly Habitats
Providing food, water, and natural cover encourages birds to fly close to favored spots. Feeding stations and water dishes near open areas allow dynamic flight opportunities against clear backgrounds.
Control Background Clutter
Backgrounds affect focus and composition. Choose angles that frame birds against sky, distant foliage, or uniformly colored backgrounds to help your camera’s autofocus and create better contrast.
4. Step-by-Step Method for Photographing Birds in Flight in Your Backyard
| Step | Action | Details | Tips |
|---|---|---|---|
| 1 | Scout your bird hotspots | Identify feeder locations or perches from which birds regularly take off or land | Early observation helps anticipate flight paths |
| 2 | Setup camera and tripod | Mount camera with telephoto lens; use tripod or monopod for stability | If handheld, practice stable grip techniques |
| 3 | Adjust camera settings | Set shutter speed >=1/2000s, aperture around f/5.6-f/8, ISO auto or manual, burst mode | Test settings in ambient light before bird activity |
| 4 | Choose autofocus mode | Continuous focus with tracking and a flexible focus point (zone or wide area) | Pre-focus on a perch to reduce lag |
| 5 | Notice anticipated flight | Watch bird behavior and direction for timing shots at takeoff, landing, or mid-flight | Patience is key; avoid startling birds |
| 6 | Start shooting bursts | Fire burst shots during flight phases you predict (wingbeats, glide, landing approach) | Review images periodically to adjust settings |
| 7 | Evaluate and refine | Check images for sharpness, exposure, composition; tweak settings accordingly | Experiment with different angles and backgrounds |
5. Ethical Considerations to Protect Backyard Birds
- Avoid Flushing: Never startle birds to force flight; this causes stress and disrupts natural behavior.
- Limit Playback Use: Sound playback can be useful to attract specific species, but use it sparingly to prevent distress or territorial conflict.
- Minimize Human Presence: Reduce movement and noise near feeding and nesting areas during photography sessions.
- Respect Nesting Seasons: Avoid disturbance around nests or young birds; flight photography should be secondary to bird welfare.
6. Comparing Techniques: Handheld vs. Tripod Photography for Birds in Flight
| Feature | Handheld Shooting | Tripod/Monopod Shooting |
|---|---|---|
| Mobility | High – can quickly reposition for different angles | Limited – slower to adjust, but more stable |
| Stability | Lower – prone to camera shake | Higher – reduces blur, steady framing |
| Weight and Fatigue | Potentially tiring holding heavy lenses | Less tiring; spread weight, enabling longer sessions |
| Speed of Reaction | Faster – can anticipate sudden bird movements | Slower due to adjustment time |
| Complex Shots (tracking) | Challenging, requires practice and body control | Easier with panning heads and smooth adjustments |
| Suitability for Beginners | More accessible, no extra gear needed | Recommended if you have the gear and space |
7. Post-Processing Tips
- Crop Smartly: Birds in flight often occupy a small frame area; cropping improves composition but avoid excessive noise amplification.
- Sharpen Selectively: Apply sharpening to wings and eyes for impact without creating unnatural artifacts.
- Adjust Exposure and Contrast: Enhance details in feathers and wing patterns, but maintain natural look.
- Noise Reduction: Use noise reduction judiciously for high ISO images, balancing clarity and texture.
Frequently Asked Questions
Q: What time of day is best for photographing birds in flight?
A: Early morning and late afternoon offer softer light that adds warmth and reduces harsh shadows, making feathers and wing details more vivid. These times also often correspond with higher bird activity.
Q: How can I prevent my camera from losing focus on fast-moving birds?
A: Use continuous autofocus mode with tracking and a wider focus area. Pre-focus on perches or areas birds frequent before taking off to reduce focus lag.
Q: Is it ethical to use recorded bird calls to attract birds for photos?
A: Use playback sparingly and ethically. Overuse or playing calls during sensitive periods can disturb birds, interfere with natural behavior, or cause stress. Always prioritize the birds’ wellbeing.


