
How to Capture Backyard Bird Portraits with Natural Lighting Techniques

By Robert Hale · Senior Editor
Published January 1, 2026 · Last reviewed May 12, 2026
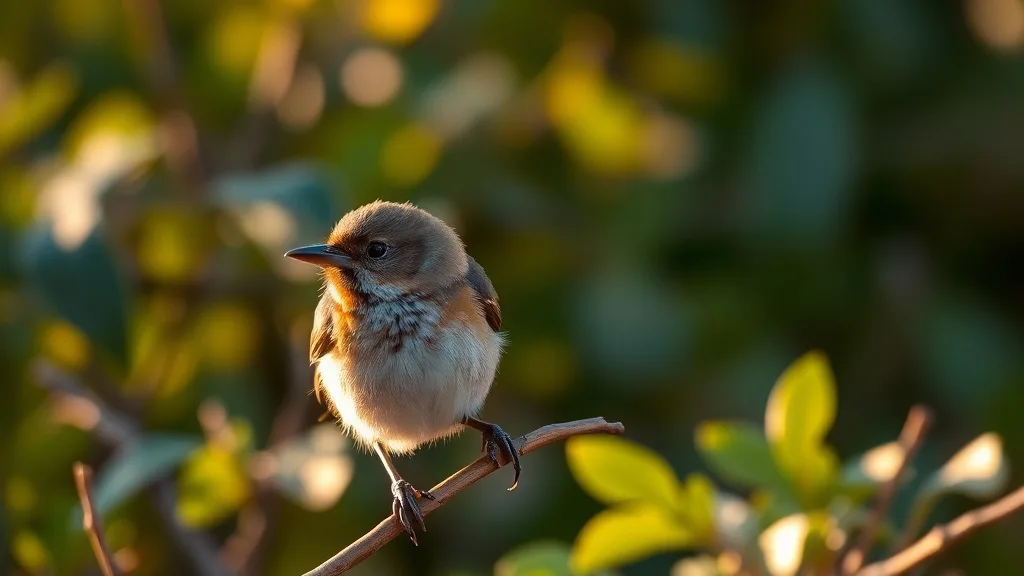
Capturing sharp, detailed backyard bird portraits can be frustrating, especially when relying solely on natural lighting. Many birders find their photos underexposed, washed out, or lacking in detail because of the challenges posed by fluctuating natural light conditions. This guide will help you understand how to harness natural lighting effectively, improving your backyard bird portraits without needing complex setups or artificial lights.
Understanding Natural Light for Bird Photography
Natural light is the backbone of authentic backyard bird portraits. Unlike studio photography, where lighting can be fully controlled, natural light varies by time of day, weather, and surroundings. The key is to use this changing light to your advantage without disturbing the birds.
What Makes Good Natural Light?
- Quality: Soft, diffused light—such as on overcast days or during golden hours—reduces harsh shadows and highlights, helping bring out fine details in feathers.
- Direction: Light coming from the side or at an angle emphasizes texture and shape, adding depth to your subject.
- Color Temperature: Early morning and late afternoon light has warm tones that can enrich your bird’s plumage colors.
- Intensity: Bright midday sun can create hard shadows and blown highlights, often undesirable in portraiture.
See also: Best Practices for Photographing Nesting Birds Without Causing Stress
How to Capture Backyard Bird Portraits Using Natural Light: Step-by-Step
1. Choose the Best Time of Day
Aim to photograph during the golden hours—shortly after sunrise and before sunset—when the sunlight is warm and directional but still soft. Avoid harsh midday sunlight unless the birds are in deep shade.
- Example: A robin photographed at 7 AM will often show more color and detail than one shot at noon under harsh sun.
2. Position Yourself According to the Light Source
Place yourself so the sun illuminates the bird from the side or slightly in front at an angle. This lighting highlights intricate feather details and avoids flat-looking images.
- Tip: Use natural elements like branches or bushes as light modifiers to soften the light if needed.
3. Use Natural Reflectors
Wet pavements, white fences, or light-colored surfaces near your setup can bounce light back onto the bird, filling in shadows without harshness.
- Avoid using artificial reflectors that might startle birds or create unnatural light.
4. Adjust Camera Settings for Available Light
- ISO: Keep as low as possible for image quality, increase only if necessary in lower light.
- Aperture: Use a wide aperture (f/4–f/6.3) to create a shallow depth of field and isolate the bird from a busy background.
- Shutter Speed: Aim for a fast shutter speed (1/1000s or faster) to freeze movement unless the bird is perfectly still.
5. Let the Bird Set the Pace; Minimize Disturbance
Approach slowly and quietly, stay at a respectful distance, and avoid any movement that could flush birds. Ethical bird photography ensures the welfare of your subjects.
Comparison of Natural Lighting Scenarios for Backyard Bird Portraits
| Lighting Condition | Pros | Cons | Ideal For |
|---|---|---|---|
| Golden Hour (Sunrise/Sunset) | Soft, warm light; excellent texture | Short duration; needs planning | Detailed, colorful portraits |
| Overcast Day | Even, diffused lighting; no harsh shadows | Flatter colors; potentially low light | Soft portraits without shadows |
| Midday Sun | Bright and vibrant colors | Harsh shadows; high contrast | Birds in shade or with directional side light |
| Shade on Sunny Day | Softer light and colors; no glare | Lower light levels require higher ISO | Intimate close-ups |
How to Use Reflectors and Diffusers (Natural and Minimal) Without Disturbing Birds
While artificial reflectors are common in studio settings, backyard birders should prioritize natural or minimal intervention to avoid stressing wildlife:
- Use white surfaces, pavements, or light walls as reflectors.
- Employ overhanging broad leaves to diffuse direct sunlight naturally.
- Experiment with positioning feeders or perches near natural light modifiers.
Common Pitfalls and How to Avoid Them
- Flushing Birds: Avoid sudden movements and loud noises; use longer lenses to keep your distance.
- Overexposure in Bright Sun: Underexpose slightly (-0.3 or -0.7 EV) or use spot metering on the bird’s eye or feathers.
- Flat Images Due to Poor Light Direction: Reposition yourself to change the angle of light or wait for better lighting conditions early morning or late afternoon.
- Background Clutter: Use a wide aperture to blur distracting backgrounds, or change vantage point for a cleaner backdrop.
Tips for Ethical Backyard Bird Photography
- Never use playback or recorded calls aggressively to attract birds.
- Avoid baiting with feeders or food excessively to cause unnatural congregations.
- Respect nesting sites and maintain a safe, non-invasive distance.
- Prioritize the bird’s natural behavior over the perfect photo.
Summary Table: Key Lighting Tips for Backyard Bird Portraits
| Tip | Action | Expected Benefit | Ethical Considerations |
|---|---|---|---|
| Shoot during golden hour | Plan morning or late afternoon | Warm, textured, flattering light | Avoid disturbing birds by sudden changes |
| Use side lighting | Position yourself at angle | Adds depth and dimension | Maintain distance; avoid obstruction |
| Utilize natural reflectors/diffusers | Use light-colored natural surfaces | Fill in shadows; soften harsh light | Use only natural elements to avoid disturbance |
| Minimize flushing | Move slowly, use telephoto | Keeps bird relaxed and natural | Always prioritize bird welfare |
| Adjust exposure based on light condition | Underexpose bright highlights; raise ISO when needed | Well-exposed images without lost detail | Avoid chasing shots in poor conditions |
Frequently Asked Questions
Q: Can I use flash to improve natural lighting in backyard bird portraits?
A: Flash can startle birds and cause unnatural shadows. It’s best to rely on natural light and approach lighting strategically to avoid disturbing your subjects.
Q: What is the ideal lens focal length for backyard bird portraiture?
A: A telephoto lens with a focal length between 300mm and 600mm allows you to photograph birds from a respectful distance while filling the frame nicely.
Q: How can I avoid distraction in the background when shooting birds?
A: Use a wide aperture to blur backgrounds, improve your composition by changing angles, or position yourself to utilize simple, natural backdrops like a patch of sky or uniform foliage.
Natural lighting brings out the true colors and character of backyard birds, and by following these steps and ethical practices you can capture stunning portraits that respect wildlife and elevate your birding hobby.


