
Best Camera Settings for Sharp Backyard Bird Photography Outdoors

By Robert Hale · Senior Editor
Published January 1, 2026 · Last reviewed May 12, 2026
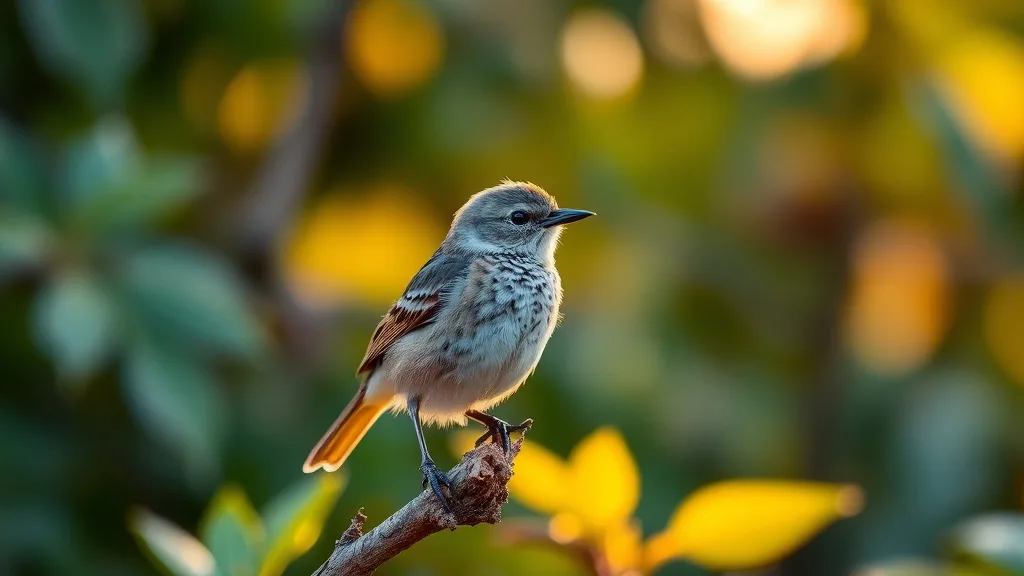
Best Camera Settings for Sharp Backyard Bird Photography Outdoors
You’ve set up your backyard bird feeder, spotted a favorite bird landing nearby, and raised your camera, but the photo comes out blurry or dull. Sharp bird photos outdoors aren’t just about luck — they require optimizing your camera settings to handle motion, lighting, and distance. This guide will walk you through the best camera settings to get crisp, vibrant bird photos in your backyard, no matter your gear or experience level.
See also: How to Capture Backyard Bird Portraits with Natural Lighting Techniques
What It Is: Sharp Backyard Bird Photography
Sharp bird photography means capturing clear, detailed images where feathers, eyes, and textures are distinct. Because birds are fast-moving, often perched at varying distances, and usually photographed outdoors with changing light, getting sharp photos involves managing shutter speed, aperture, ISO, focus, and stabilization carefully.
Good sharpness helps you appreciate patterns and colors, identify species, and share images that truly reflect the beauty of backyard birds. It also reduces frustration over missed shots or unsalvageable blur.
How to Achieve Sharpness: Key Camera Settings Explained
1. Shutter Speed: Freeze the Moment
Birds move quickly — flying, hopping, turning their heads. To avoid motion blur:
- Use a fast shutter speed: Aim for at least 1/1000th of a second or faster. For small, rapid-moving birds or flight shots, 1/2000th or higher may be necessary.
- Increase shutter speed in low light by adjusting ISO or aperture, but prioritize speed first.
2. Aperture: Balance Sharpness and Background Blur
A wide aperture (small f-number) creates a shallow depth of field, helping your subject pop from a blurred background. However:
- Too wide (e.g., f/2.8) and parts of the bird may fall out of focus if it’s not exactly parallel to your sensor.
- Too narrow (e.g., f/11 or higher) reduces light and can introduce diffraction, decreasing sharpness.
Optimal aperture for bird shots is often between f/5.6 and f/8, giving enough depth to keep the bird in focus while maintaining brightness and sharpness.
3. ISO: Maintain Exposure Without Adding Noise
ISO controls sensor sensitivity. Outdoors in good light, keep ISO as low as possible (e.g., ISO 100-400) to minimize graininess.
When light is limited (early morning, shade), increasing ISO can compensate and allow higher shutter speeds, but avoid going too high (above ISO 1600-3200) unless your camera handles noise well.
4. Auto Focus: Lock Onto Your Subject Precisely
Birds require precise autofocus:
- Use continuous autofocus (AI Servo/AF-C mode) to track moving subjects.
- Select a single focus point or a small group rather than full auto-area to avoid focusing on background leaves or feeders.
- Focus on the bird’s head or eye for maximum impact.
5. Image Stabilization: Complement but Don’t Rely On It
Stabilization systems help reduce camera shake:
- Use it in slower shutter speed situations or when handholding a long telephoto lens.
- At fast shutter speeds (>1/1000), stabilization is less critical but still helpful during panning.
6. Metering Mode and Exposure Compensation
- Use spot or center-weighted metering focused on the bird to avoid misexposed backgrounds.
- Adjust exposure compensation (+/-) if your bird is dark with a bright background or vice versa.
7. Use RAW Format for Maximum Quality and Flexibility
RAW files preserve more detail and allow finer post-processing adjustments of exposure and sharpness than JPEGs.
When to Use These Settings
- Good daylight: ISO 100-400, shutter speed 1/1000+, aperture f/5.6-f/8.
- Shade or cloudy conditions: Increase ISO to 800-1600, aperture f/4-f/5.6, shutter speed 1/1000 or as fast as possible.
- High-speed flight or action shots: Shutter speed 1/2000+, aperture f/4-f/6.3, ISO as needed.
- Static perched bird, good light: You can balance aperture and ISO for maximum sharpness and depth.
Common Pitfalls to Avoid
- Slow shutter speeds causing motion blur — always prioritize shutter speed for birds.
- Too narrow apertures (high f-number) that reduce image sharpness due to diffraction.
- Over-relying on autofocus without checking focus points, ending with soft subject focus.
- Using flash or playback sounds to startle birds, which is both unethical and counterproductive.
- Shooting in JPEG-only mode and losing flexibility to adjust exposure and sharpness later.
Comparison Table of Key Settings For Different Backyard Birding Scenarios
| Scenario | Shutter Speed | Aperture | ISO Range | Focus Mode | Notes |
|---|---|---|---|---|---|
| Bright daylight perched | 1/1000 - 1/1500 | f/5.6 - f/8 | 100 - 400 | Single Point, AF-C | Balanced exposure, good sharpness |
| Early morning or shade | 1/1000 | f/4 - f/5.6 | 800 - 1600 | Single Point, AF-C | Compensate for low light |
| Flight or rapid movement | 1/2000+ | f/4 - f/6.3 | 400 - 1600 | Continuous AF-C | Freeze motion, fast tracking |
| Static bird, overcast sky | 1/800 - 1/1000 | f/6.3 - f/8 | 400 - 800 | Single Point, AF-C | Moderate light, good depth |
Practical Tips for Sharp Backyard Bird Photos
- Use a tripod or monopod for additional camera stability when possible.
- Pre-focus around feeder areas where birds commonly perch.
- Practice ethical birding: avoid playback calls or sudden movements that disturb wildlife.
- Review your photos on a large screen to analyze focus and adjust settings accordingly.
Conclusion
Mastering sharp bird photography outdoors is about understanding and controlling your camera’s shutter speed, aperture, ISO, and autofocus to balance light and motion. By applying the appropriate settings to your backyard conditions, you can consistently capture stunning, detailed bird portraits that highlight the wondrous details of your feathered visitors.
Frequently Asked Questions
Q: What is the minimum shutter speed I should use for small songbirds?
A: Generally, aim for 1/1000th of a second or faster to freeze motion and avoid blur, especially when birds are active or in flight.
Q: Is it better to shoot birds wide open (lowest f-number) or with a smaller aperture?
A: For sharpness, use a moderate aperture (around f/5.6 to f/8). Very wide apertures create shallow depth of field which can blur parts of the bird; too small apertures reduce sharpness due to diffraction.
Q: Should I rely on autofocus or manual focus for backyard birds?
A: Autofocus with a single or small focus point works best outdoors on birds, especially in continuous AF mode to track movement. Manual focus is challenging with erratic bird motion.


